Accumold has a reputation for innovation and exceeding customer expectations. The company operates in an environment where part dimensions are sometimes minute, tolerances are always exacting, geometric complexity can be mind-boggling, and customer expectations are for zero failure rates and peerless repeatability.
The key to success in reaching sub-micron tolerances is risk mitigation, as each step in the product development process can potentially introduce tolerance stack-up. Control requires that Accumold is truly vertically integrated, with tooling, molding, validation, and automated assembly all under one roof, and each “department” collaborating to ensure optimal outcomes.
Validation is a crucial area, and Accumold partners with leading non-contact optical metrology specialist, ZYGO, to manage some of its more demanding measurement and validation work. Nowhere is the well-worn phrase “if you cannot measure it, you cannot make it” more relevant than in the world of micro molding. Here parts are often used in safety-critical applications and can be as small as a grain of sand. Total confidence in the design intent is vital, and as such, so is confidence in the metrology tools that are used.
Accumold’s metrology capability is critical at all steps of the micro molding process – from initial experimental design runs and stress tests, to prototype and production qualifications runs. Ensuring a quality process is accomplished through regular gage repeatability and reproducibilitiy (GR&R) studies, providing both Accumold and their customers confidence in the process and the parts that it produces.
With measurement taking this central role, metrology moves from being a necessary evil to an enabling technology. Accumold’s metrologists have been successful in helping customers improve their design, re-dimension parts, and better use Geometric Dimensioning & Tolerancing (GD&T) so that the part is easier to mold, easier to measure, and performs better for the end-user.
Very often in a micro-molding scenario, metrology and validation-related issues can be challenging, with part size, part fixturing, print tolerances, and surface roughness introducing complexities. Of these, part size is the critical challenge. Micro-molded parts can be dimensioned in microns, with features that only become visible under 10x (or greater) magnification. With such small part sizes, non-contact metrology is the ideal solution.
To meet the stringent requirements, it is key to determine how to fixture the part being inspected so repeatable and reproducible measurements are achieved. Accumold designs and manufactures steel or 3D plastic custom fixtures designed to hold parts in various orientations to ensure they can measure all the features in either automated or manual measurement processes.
One more unique challenge for these components is the surface roughness. Due to the small size and essential requirements of finish, small variations can have more dramatic effects on the final product than might be observed with a larger component. Non-contact metrology tools are vital for such applications, as tactile tools having the potential to compromise surface integrity.
With the validation requirements and challenges associated with them, it becomes apparent that metrology is truly an enabling technology at Accumold. The metrology tools available in 2021 are far superior to those that the company had at its fingertips even ten years ago.
Metrology instruments are continually evolving, and it is essential to actively assess new technology to remain at the apex of the industry. Accumold utilizes a wide variety of advanced metrology technology including automated vision inspection (AVI), robotic handling, and non-contact optical surface metrology, such as the coherence scanning interferometer equipment from ZYGO to measure micro features and surface roughness.
There is no doubt that industry’s perceptions of optical metrology systems have changed in recent years, and its uptake is growing substantially year to year. There are obvious reasons for this: its ability to measure without damaging surfaces or features on sometimes delicate components. However, optical metrology also stimulates the move to greater manufacturing automation due to its inherent speed compared to contact systems. It can also quickly undertake full-field measurement rather than focusing on specific part features one at a time.
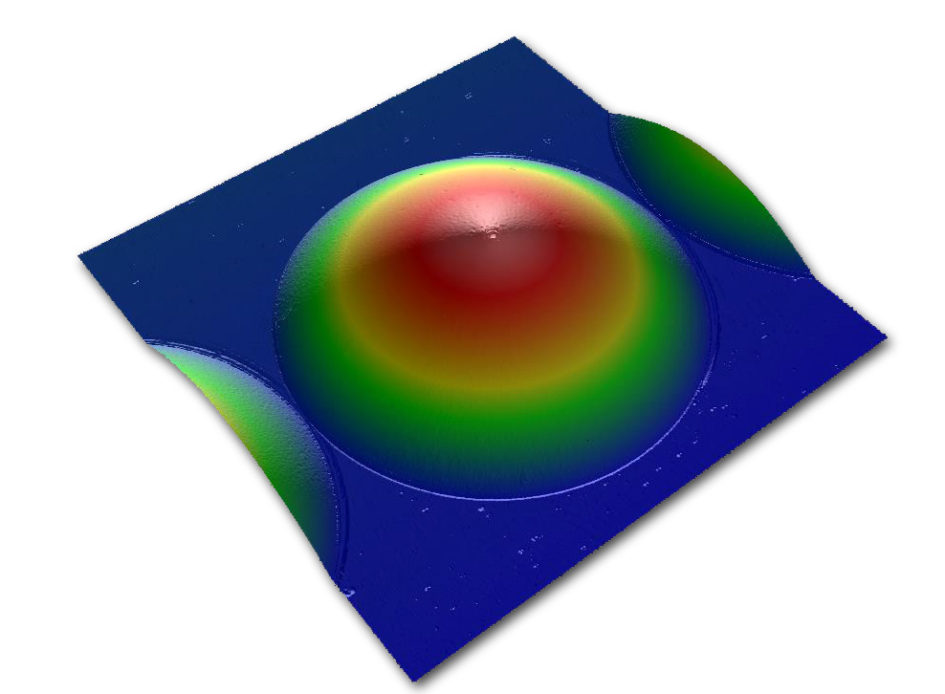
Accumold has used ZYGO optical profilers for many years starting with a NewView 7300 and later adding the next generation NewView 8300 to the fleet. The company uses both machines to measure 3D surface roughness, and critical Z height dimensions, as well as a custom metrology solution for characterizing a molded lens against its aspheric design. The data Accumold gets from the ZYGO equipment has been critical in proving molding and measurement capability to its customers. The company has also shared the data available from the ZYGO tools with customers to assist in their own analysis.
The main reason for selecting ZYGO was the ability to accurately measure parts made from high temperature and clear resins used to mold lenses. The competing technologies struggled with transparent materials, and a few didn’t generate the data necessary that was needed for analysis. One device required Accumold to spray the surfaces of clear resin parts with an opaque coating which was not optimal because the coating changed the part dimensions.
One of the best ways to derive maximum value from metrology, is to work more as partners and collaborators to solve a challenging problem. Accumold and ZYGO have taken this approach for many years. Accumold’s first ZYGO optical profiler was the NewView 7300, and the team worked with ZYGO to devise a customized analysis routine for the micro-molded lenses that were being made. As technology evolved, the two companies continued to work together to solve interesting and challenging metrology issues both on the original tool, and on the NewView 8300 and its latest software platform.
Instead of simply purchasing a tool, ZYGO and Accumold have maintained a healthy dialogue to ensure ZYGO’s product and capability roadmap reflects Accumold’s metrology needs — continually providing value across their entire organization.
Accumold thinks that working collaboratively with metrology suppliers in this way is the future, and will ensure that technology evolves with market and customer needs. This also plays to the fact that ZYGO nurtures a partnership with its customers and enters into long-term alliances with customers to offer pragmatic solutions to changing metrology requirements.
The role of metrology in a vertically integrated micro molding company is evident and central to overall success. 3D optical metrology from ZYGO is now a powerful enabling technology at Accumold, and has a vital role to play in the timely and cost-effective production of often exacting end-use parts and components.

