Precision Beryllium mirror manufacturer, Cambridge Technology, explains how the use of best-in-class interferometry hardware and software solutions has streamlined its manufacturing processes and added efficiencies as well as time and cost-savings across the company.
Tyler Steele, Product Manager – Laser Interferometers
ZYGO, Middlefield, CT, USA
Technological advances over recent years have elevated metrology from being a “necessary evil” in manufacturing scenarios to enabling technologies, allowing the measurement of previously impossible part characteristics and therefore driving innovation across numerous industry sectors.
It is arguable that best-in-class metrology solutions are the catalyst that drive the trend towards miniaturization, higher precision, faster throughput, and fewer rejects. As the old adage goes, “If you can’t measure it you can’t make it”, but if you can measure to the required accuracy repeatably, then the sky is the limit in terms of producing cutting-edge parts and components.
One company operating on the bleeding-edge of precision is Cambridge Technology, based in Taunton in the United Kingdom. Cambridge Technology boasts an over 50-year pedigree manufacturing ultra-lightweight coated beryllium mirrors for its parent facility in Bedford, MA, USA. These mirrors which are integrated into laser beam steering assemblies are used in various applications from PCB drilling to laser eye surgery.
Cambridge Technology had a goal to advance its design and manufacturing capabilities with a focus on integrating and leveraging process metrology to optimize quality control and manufacturing yields.
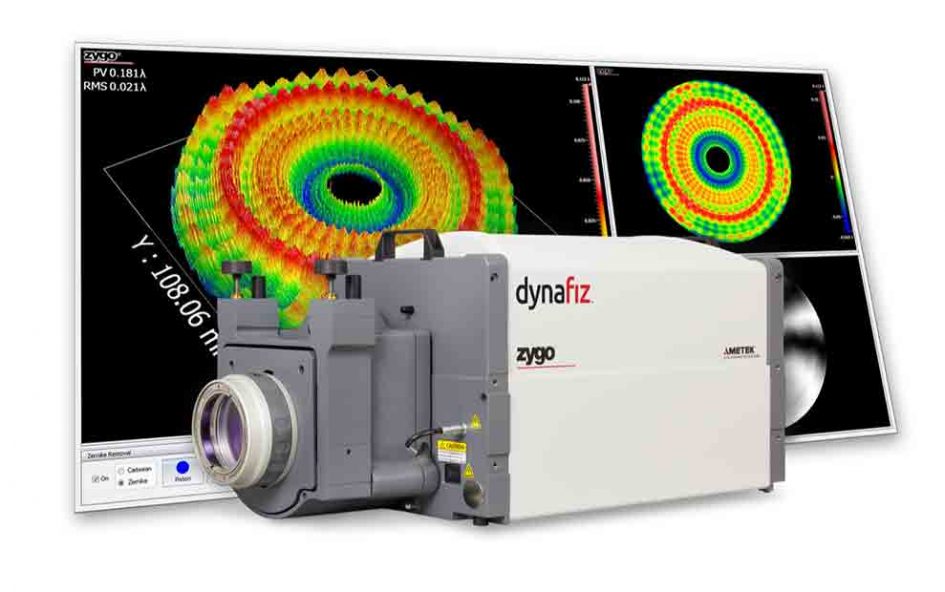
The exacting nature of the mirrors manufactured by Cambridge Technology has meant that over time, it has learned to partner with innovative technology suppliers to enable optimal manufacturing processes. The company chosen to help advance its metrology capabilities was ZYGO, which supplied Cambridge Technology with new state-of-the-art laser interferometer systems operating on ZYGO’s Mx metrology software.
This article analyses the role of laser interferometry as an integral part of an optimized automated manufacturing process, highlighting key issues in supplier selection and providing first-hand testimony from Cambridge Technology as to how it used ZYGO’s advanced optical metrology solutions to advance innovation in product design and manufacturing process development.
Assessing the Advanced Metrology Landscape
ZYGO has elevated the status of metrology to a disruptive, enabling technology, with its non-contact, non-destructive 3D optical profilers and laser interferometers.
Optical metrology is extremely versatile and has an important role in the verification of quality and design intent. Today, in many scenarios, it has become the preferred solution, benefitting from the fact that it is non-contact (meaning it can be used to measure delicate deformable components), non-destructive, fast, highly sensitive, and exhibits exceptional resolution and accuracy characteristics.
For ZYGO, however, the use of its optical metrology instruments goes well beyond quality control as its benefits are being utilized in advanced R & D, process development, process control, and overall manufacturing optimization.
Cambridge Technology understands that interferometry is the logical choice for the advanced characterization of its critical parts and recognized that there are no other metrology solution innovators that came close to matching the level of experience and understanding of ZYGO.
Cambridge Technology and ZYGO’s Laser Interferometry
Cambridge Technology uses laser interferometry to measure the surface form of almost every precision beryllium mirror it manufacturers, and at various stages in the production lifecycle for a clear understanding of performance characteristics.
The company’s original laser interferometry solution was seen as being deficient in two key areas. First, it was prone to environmental vibrations, and second measurement data was stored as individual text files (or text reports) which meant that it was extremely difficult to analyse.
Each unique mirror in the Cambridge Technology range required a different application which in turn required specific configuration of the laser interferometer. This made the metrology operator-intensive, and required technicians to manually load different masks for each mirror type and for every measurement performed, sometimes three times per mirror.
To overcome these deficiencies, the company required a metrology solution that would promote process automation and relieve manual workload pressure while minimizing sensitivity to environmental vibration which had led to some mirrors requiring remeasuring.
The solution chosen was to replace existing laser interferometers with current generation instruments operating on ZYGO’s Mx software, which immediately allowed the company to realize improvements in processing times and a reduction in operator errors.
Greg Salter, Quality Engineer at Cambridge Technology continues, “The reduction in processing times comes as a result of our ability to customize Mx™ using scripting. The reduced processing times for parts with multiple masks (apertures) has been a massive improvement, along with the removal of the necessity of operators from having to manually load each mask, or having to select different parts of a mask to re-analyze different apertures of a mirror.”
Using ZYGO’s Mx™ software and Python scripts, Cambridge Technology now has a database of all its parts, with corresponding tolerances, settings and masks that is easily selectable by the operator. Tolerances can be adjusted remotely in a centrally located database by the production engineer without disrupting the production workflow.
Salter explains, “MX loads the correct masks and tolerances for each part automatically by selecting the part number from a drop-down menu. The ZYGO laser interferometer software can now automatically load and swap different masks during measurement without operator input, which means measurement is quicker, throughput of mirrors is increased, and operator errors have been reduced. The flatness data automatically outputs to a database for easy analysis and monitoring of each stage of manufacturing (SPC etc…). This has already enabled us to use control limits at various manufacturing stages to ensure that the mirrors will be compliant at the end of the manufacturing process. As we continually improve our methods of manufacture, the analysis that this system provides will enable us to gradually reduce how many mirrors we inspect per batch of mirrors, whilst still providing flatness compliance.”
“If a mirror is not suitable for the application for which it was intended, Mx™ can check similar mirror types and advise if we can use that mirror for an alternative application thus reducing scrap. Our parent company in Bedford, MA, USA also uses our database to control their ZYGO interferometers, it gets instantly updated at both sites simultaneously, which has once and for all ironed out discrepancies between our methods of measurement. Our parent company also stores measurement data so we can monitor mirror performance as it progresses through manufacturing. All of this is achieved using the ability of Mx to allow us to customize how it works by using Python scripts to adapt to our required methods.”
It was vital that whatever software solution Cambridge Technology chose could be deployed over multiple instruments across manufacturing facilities in multiple locations to support a 24/7 manufacturing operation. Minimizing the amount of downtime and levels of operator training were a must, and this was achieved through a good partnership between ZYGO and Cambridge Technology.
Salter explains. “We found MX™ to be a simple, efficient, and supportable solution that minimized impact on resources and capacity within the manufacturing environment. The intuitive design of Mx and its overall simplicity were hugely important, as was the help and assistance from Lambda Photometrics and ZYGO with our particular issues and requirements when it came to problems we were unsure how to overcome, especially with python scripts. Lambda and ZYGO provided an understanding of how to achieve certain goals using python (including sending us code examples), and providing us with a way of using a catalogue of existing Mx masks on the new interferometer.”
Creating a “Set-and-Forget” Application Software Environment
The use of the scripting function within ZYGO’s Mx™ software has allowed Cambridge Technology to create a recipe driven “set-and-forget” application.
“This was achieved by utilising a database which we designed and built to work within Mx™, containing all of the parameters required to enable the measurement of any mirror. These include mask names, number of masks and flatness tolerances. All the operator has to do is select a part number from a list (or scan a barcode on our manufacturing datapack) and Mx applies the predetermined settings for that particular mirror prescription, records its a serial number, acquires and analyses the data and informs the operator if it is a pass or a fail in simple terms,” Salter explains.
“With ZYGO’s Mx-based metrology instruments our configuration control is much more efficient and we now have the ability to embark on a statistical process control (SPC) methodology for monitoring our operations. ZYGO’s solutions have helped us drive our mirror yields up to 99% with excellent correlation between our two sites.”
Summary
Using ZYGO’s Mx™ metrology software, Cambridge Technology has now upgraded the capabilities of its interferometers, realizing significant savings. This has led to the company being able to realize cost savings by removing bottlenecks in production and quality control, and in turn has provided better utilization of staff resources and an overall improvement in manufacturing efficiencies.


