In the context of a manufacturing environment, machine tools represent a weighty investment with the business end – the spindle assembly, toolholding and cutting tools – being a constant focus for maintaining precision, surface finish, repeatability and productivity.
However, if a spindle remains un-monitored between routine service programmes, in the course of a full-on period of manufacture, the opportunities for gradual fall off in spindle performance can have a significant detrimental effect.
Within the spindle, components vulnerable to failure or degradation are the spring stack, grippers, the rotary coolant mechanism and seals.
Reduced clamping force between the spindle jaws and the toolholder can have a long-term impact on poor surface quality due to vibrations, while increased tool wear and shorter insert life spans with possible spindle taper corrosion can result from micro-movements and seal failure.
More dramatically there is the possibility of tool breakage, expensive waste due to poor cutting performance, machine downtime if the spindle needs repair or refurbishing and always with a risk of injury to the machine operator.
Sound rather dramatic? It could be. Now, Gewefa offers a prevention option.
One of the leading suppliers of pull force gauges, test bars and alignment kits Corsham based Gewefa UK is a specialist on all things toolholding. As their managing director Keith Warner explains, they call upon their own manufacturing resources as well of those of one of their UK partners to create a spindle monitoring ‘kit of parts’ for use by manufacturers themselves or by mobile service engineers.
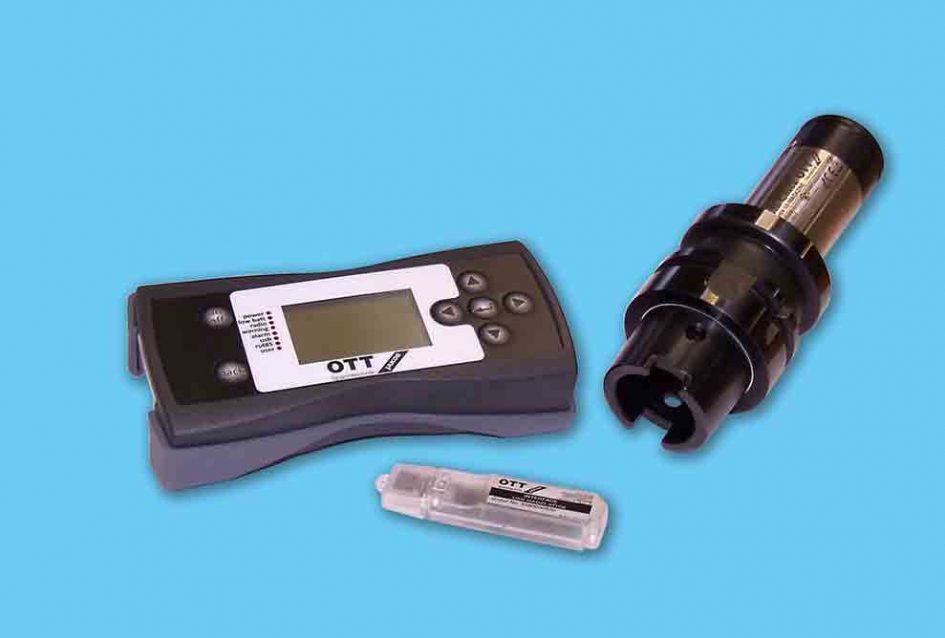
“We have worked very closely with OTT-Jakob in Germany for a number of years and one of their products – the Power Check pull force gauge – has found favour with many involved with machine tool operation and maintenance,” he explains.
“Many service engineers working for leading name machine tool builders and suppliers now carry a Power Check as a portable service tool, he adds. Likewise, Gewefa’s factory in Burladingen, Germany is dedicated to high precision toolholder and accessory manufacture so all the test bars and alignment components manufactured there are totally under our control and meet our demanding quality standards,” he adds.
Use of a manual pull force gauge either on a regular basis by the machine operator or, in more automated (high volume) production environments by maintaining a gauge permanently in the toolholder carousel, can produce regular streams of data that can very quickly highlight any fall off in spindle performance.
For a more complete picture it is also worth considering test bars in the monitoring process which are used to check the spindle run out and can be supplied with a flange or in plain format. The bars are precision ground for a combination of precise surface finish and concentricity and are supplied with test certificates.
The third component is the ‘ATC’ alignment kit used for accurately aligning the tool change arm to the spindle. Comprising four elements – taper/flange/shaft and bush – the components are usually supplied in a bespoke tool case for safe storage and transportation.
There are also levels of sophistication for the Power Check that appeal to the high volume manufacturers. A fall off in tolerance can have dramatic consequences here, so many are finding the remote monitoring version an essential tool.
It can be permanently located (exactly as a toolholder) in the carousel to supply continuous data on spindle condition. The connection to the hand held data collector is wireless so an operator can monitor data collected at the spindle from up to eight different machine locations. Over 8,000 readings can be stored on the handset with these easily downloaded to a USB for transfer to a lap top or network computer system.
The Gewefa test bars are available in a range of spindle formats and all Gewefa test bars are precision ground for a combination of precise surface finish.
Concluding, Keith Warner adds; “A spindle re-build could quite easily incur labour charges of £4-5000 and that is before the cost of replacing components. By having awareness of any faults that might have a slow but damaging effect, service personnel can undertake specific remedial work early in the process and at a fraction of the cost. Not forgetting of course the disruption to production with a machine down, even if fitting a spare spindle is the option. Time is money, after all.”


