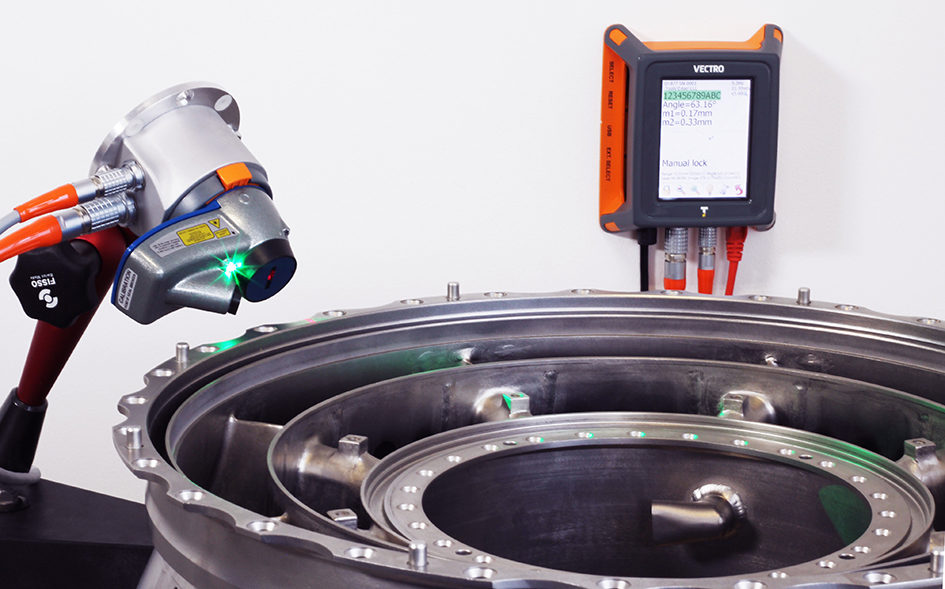
Third Dimension, the leading supplier of precision metrology solutions, will be launching two new products at this year’s Control – the International trade fair for quality assurance.
The first is Vectro; a precision automated laser measurement system and the second, Inspect; a quick and easy-to-use quality inspection software tool.
Vectro automates the advanced capabilities of Third Dimension’s best-selling feature measurement system, GapGun Pro; used for quality control by the automotive, aerospace and energy industries worldwide.
Vectro enables manufacturers to take a proactive approach to identify defects, correct persistent gap & flush issues or monitor geometric conditions and improve quality.
Integration of Vectro for automated quality checking of manufactured goods has a significant impact on reducing the headcount and rework costs, as well as the time and effort involved. Its versatile design makes it physically compatible for automated use, enabling integration either robotically or as a fixtured installation.
Vectro is designed to be simpler, faster and deliver increased levels of accuracy with excellent returns on investment. Consistent measurement positioning makes for repeatable and reliable results which is ideal for high precision break sharp edge applications.
With its tool changer compatibility and using the same VChange sensors as GapGun Pro, Vectro can perform a diverse range of measurements as well as fast throughput of production checks.
Thanks to Third Dimension’s Link software, Vectro is also capable of third party integration with existing production facilities, whether benched or with the customer’s own robot.
Visitors to Third Dimension’s stand will be able to observe two demos using the Vectro system, one integrated robotically to measure a part and the other fixed, measuring a moving part.
In an exciting collaboration with Rotary Precision Instruments, specialist developer and manufacturer of precision positioning devices for high accuracy rotary and angular inspection systems – the fixed Vectro installation demonstration will measuring an engine part on RPI’s new QuadSlimLine 400 – a rotary table specially designed for coordinate measuring machines.
Third Dimension’s second new product on show at Control is Inspect.
Fast and simple to use, Inspect is designed to enable flexible analysis of a component’s profile when used alongside Third Dimension’s GapGun Pro.
To use Inspect, GapGun measures a section of a component and records an image of its profile. This image is then imported into Inspect where the operator can look at specific sections or features of interest. This is done by using simple multi-section drag and drop tools, such as the circle fit or distance tool. The operator can dictate exactly what features they want to measure by clicking, dragging, dropping and fitting these tools on to the profile. Live results appear on screen and the user can do this as many times, and in as many different ways, as required.
Owing to its ease of use, Inspect eliminates the need to carry out tool configuration in SPC3d prior to taking a measurement, thereby reducing operator training time. Tool tips and captions also provide a helpful interface to guide and prompt the operator to maximise the potential benefit of the software.
Additionally, Inspect has a CAD comparison feature whereby the operator can check the component is built to specification by importing CAD images, to compare the quality and accuracy of the build from the original design.
Results wise, Inspect provides fast, live, accurate, traceable and reliable digital results that shadowgraph techniques just can’t match when inspecting complex shapes. This is due to the fact that shadowgraphs are taken manually and requires the operator to mould, cut and record the results which is time consuming, unrepeatable and open to interpretation, therefore making shadowgraphs inherently unreliable.
Whereas Inspect’s results are displayed in real time as the component’s profile is dissected and can be compared, saved and exported to PDF, or printed for use in management reports.
Tim Monks, Chief Executive of Third Dimension, said: “Manufacturers are increasingly looking at ways to improve quality and save time, money and resources, and we’re excited to see how both Vectro and Inspect will play a big part in helping them achieve this. We’re looking forward to showcasing these for the first time at Control 2017.”
Bristol-based, Third Dimension is a world leading developer of non-contact, precision profile measurement solutions and has a long track record of supplying metrology equipment and services worldwide to the largest names in aerospace and automotive, such Suzuki and Airbus.
Visit Third Dimension’s stand 5130 at Control to see Vectro and Inspect in action.


